
Contents
- 1 Cat Grooming Tips for Beginners: A Practical Guide
- 1.1 Essential Cat Grooming Tips for Beginners: Why It Matters
- 1.2 The Grooming Kit: Cat Grooming Tips for Beginners Start Here
- 1.3 Brushing: Where Most Cat Grooming Tips for Beginners Should Start
- 1.4 Nail Trimming: Advanced Cat Grooming Tips for Beginners
- 1.5 Ear Cleaning: Quick But Important
- 1.6 Bathing: Necessary Evil or Just Evil?
- 1.7 Dental Care: My Personal Grooming Failure
- 1.8 Special Cases: When Basic Isn’t Enough
- 1.9 A Realistic Grooming Schedule
- 1.10 When Things Go Wrong: Troubleshooting Cat Grooming Tips for Beginners
- 1.11 FAQs: Common Questions About Cat Grooming Tips for Beginners
- 1.12 Final Thoughts
- 1.13 References
Cat Grooming Tips for Beginners: A Practical Guide
I still remember the day I brought Milo home from the shelter. A gorgeous orange tabby with these huge green eyes that just stared at me like, “So what now, human?” After getting all the essentials—food, litter box, toys—I realized I had no clue about cat grooming. None. Zero. I assumed cats just… cleaned themselves? That’s what everyone says, right?
Well, turns out there’s a lot more to it than that. After six years, several scratches, and one particularly memorable bathing incident that left both of us traumatized for days, I’ve picked up quite a few tricks about cat grooming. And trust me, I learned most of them the hard way.
If you’re new to the cat parent world, this guide should save you some of the trouble I went through. Let’s talk about essential cat grooming tips for beginners that won’t end with you needing bandages. I wish someone had shared these cat grooming tips for beginners with me when I first brought Milo home!
Essential Cat Grooming Tips for Beginners: Why It Matters
OK so cats are famously clean animals. They spend like half their waking hours licking themselves. So why do we need to step in?
Well, for starters, all that licking leads to hairballs, which are gross to step on in the middle of the night (been there). Regular brushing means less fur ingested, which means fewer hairballs on your carpet. Plus, there are some things cats just can’t do for themselves:
- They can’t trim their own nails
- They struggle to clean their ears properly
- Long-haired cats often can’t prevent matting in hard-to-reach areas
- Older or overweight cats might not be able to reach certain body parts
And honestly, grooming time can be bonding time. Milo hated it at first, but now he actually purrs during our brushing sessions. Most days, anyway.
The Grooming Kit: Cat Grooming Tips for Beginners Start Here
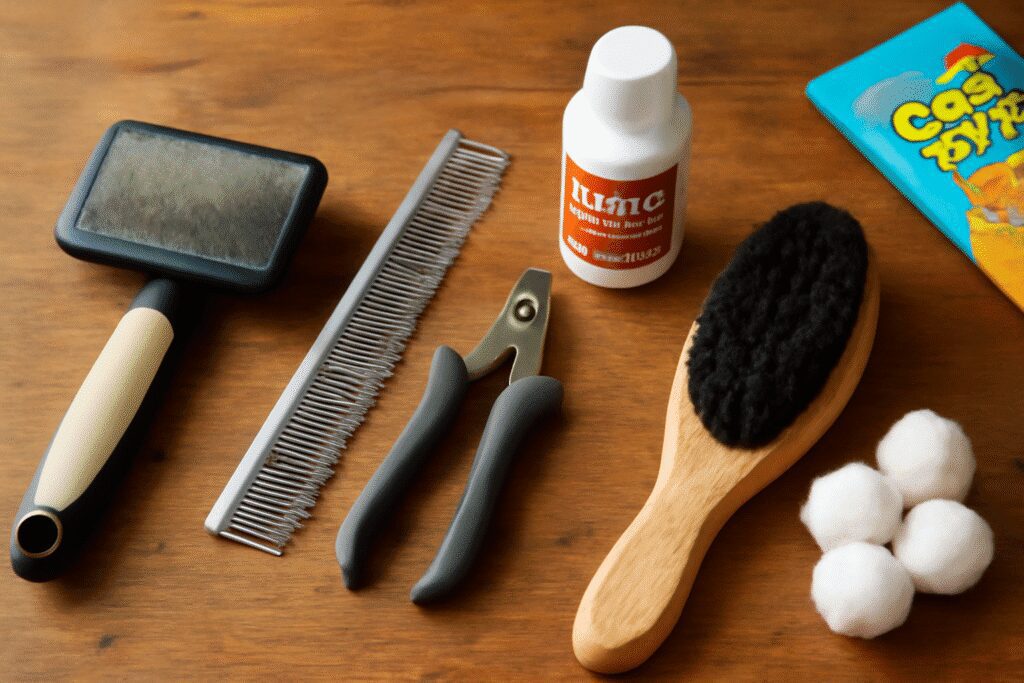
When I first started looking into cat grooming tools, I got overwhelmed. There are SO many products out there. But after wasting money on stuff that gathered dust, here’s what I think is truly essential:
For Fur Management:
- A basic slicker brush (works for most coat types)
- A metal comb for finding tangles
- A deshedding tool if your cat sheds a lot (I use mine mainly in spring and fall)
For Nail Care:
- Cat nail clippers (I prefer the scissor type, but the guillotine ones work too)
- Styptic powder—just in case you cut too close and hit the quick
Other Helpful Items:
- Unscented baby wipes for quick clean-ups
- Cat-specific toothbrush and toothpaste (though I’ll be honest, Milo still won’t let me near his teeth)
- A brush with soft bristles for face grooming
- An old towel dedicated to grooming sessions
This might seem like a lot, but you don’t need everything right away. I started with just a brush and nail clippers and built up my collection over time.
Brushing: Where Most Cat Grooming Tips for Beginners Should Start
I think brushing is the least intimidating part of cat grooming for beginners. It’s also where you’ll see the biggest immediate benefit—less fur around your house.
How Often Should You Brush?
It really depends on your cat’s coat:
- Short-haired cats: Once or twice a week is usually fine
- Medium-haired cats: Probably 2-3 times a week
- Long-haired cats: Pretty much daily, or at least every other day
- During shedding season: Add an extra session or two for any cat
Milo has medium-length fur, and I aim for brushing him every Monday, Wednesday, and Friday. Do I always manage this perfect schedule? Absolutely not. Life happens. But I try.
Making Brushing Less Dramatic
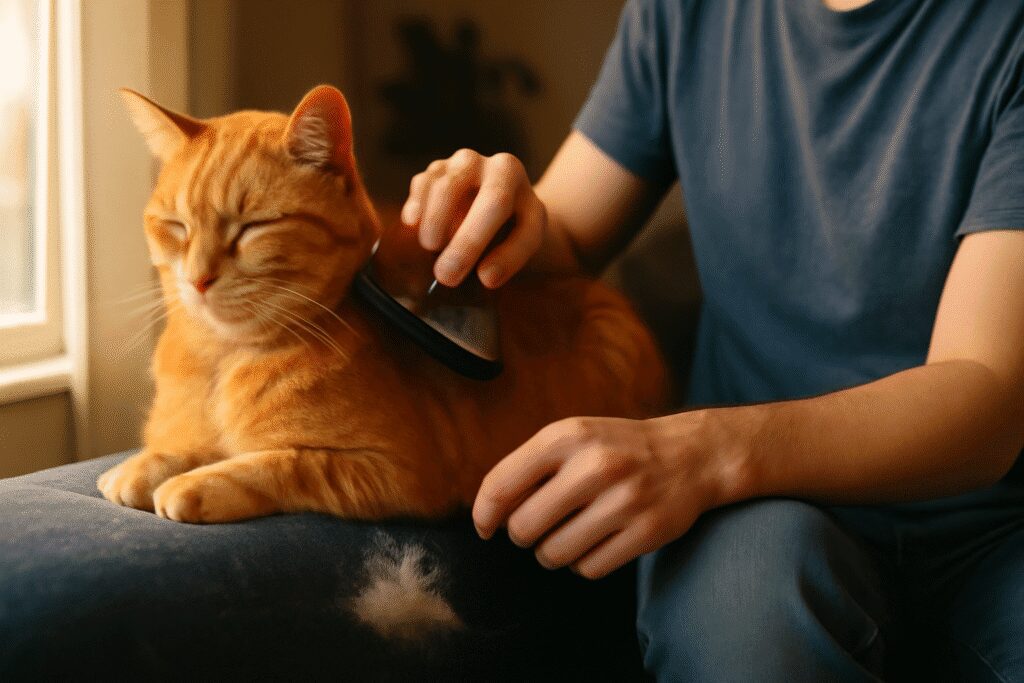
Here’s what worked for me after some trial and error:
- Find where your cat naturally likes to relax. For Milo, it’s the back of the couch by the window. That’s brushing HQ now.
- Let them sniff and investigate the brush first. Every. Single. Time. Even after years, I still do this ritual with Milo.
- Start super gentle with short strokes in the direction of fur growth.
- Begin somewhere they like being touched. For many cats, the top of the head or under the chin works. Save sensitive areas like the belly for last (if they’ll tolerate it at all).
- Talk to them while you brush. I maintain a running commentary with Milo about neighborhood birds or what I’m making for dinner. The calm voice seems to help.
- Keep the first few sessions ridiculously short. Like, 2 minutes max. You can gradually increase over time.
One weird trick that worked for me was brushing myself first with the cat brush. Milo seemed less suspicious after watching me use it on myself. Cats are strange.
Nail Trimming: Advanced Cat Grooming Tips for Beginners
Let’s talk about nail trimming, which many consider the most intimidating part of cat grooming tips for beginners. This was seriously my biggest fear when I first got Milo. I was convinced I’d hurt him, he’d hate me forever, and I’d end up a failure as a cat parent.
Six years later, we’ve reached a détente. It’s not his favorite activity, but we manage. Here’s what I’ve learned:
The Actual Process:
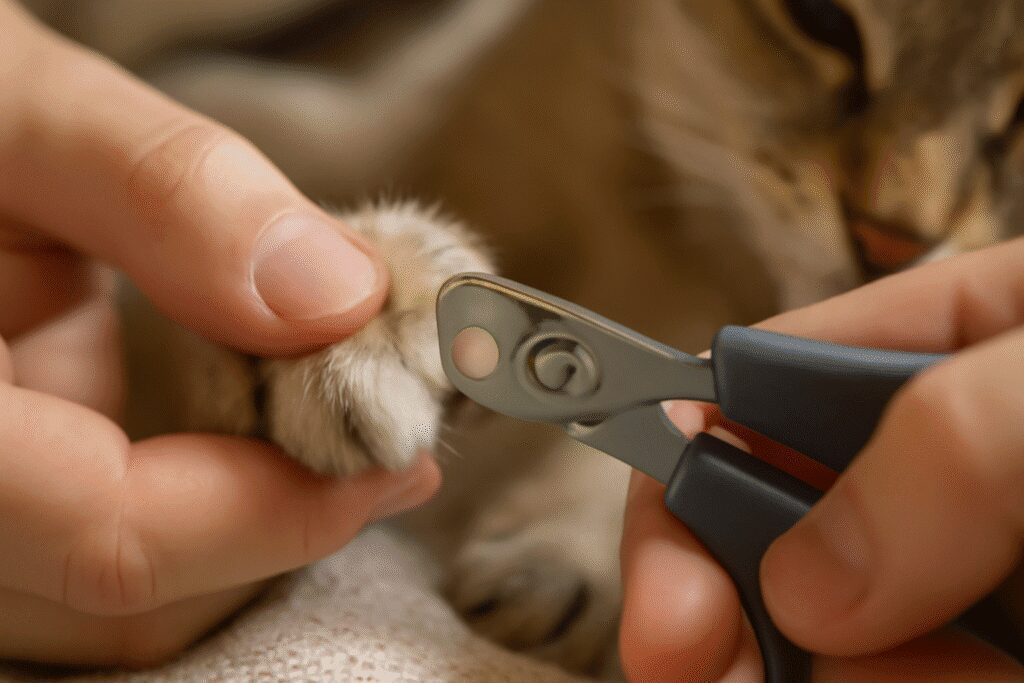
- Pick a time when your cat is already relaxed—after dinner works well for us.
- Get everything ready beforehand. There’s nothing worse than having to reach for something while trying to hold a squirmy cat.
- Hold their paw gently but firmly, and press on the pad to extend the nail.
- Look for the pink part inside the nail—that’s the quick, which has blood vessels and nerves. You want to cut just the clear/white tip beyond this pink area.
- Make a quick, confident cut. Hesitation just prolongs the experience.
My first attempt? Complete disaster. Milo bolted, I felt horrible, and we both needed a time-out. Now I can usually do all four paws in one sitting, but it took MONTHS to get there.
If your cat absolutely hates nail trims, start with just one paw per session. Or even just one nail! Seriously. Also, some cats do better lying down, some sitting up, some wrapped like a burrito in a towel with just one paw sticking out. You’ll need to experiment.
Ear Cleaning: Quick But Important
I check Milo’s ears roughly once a week, usually during a brushing session. Actual cleaning? Much less frequent—maybe once a month at most.
Healthy cat ears aren’t supposed to be pristine inside. A little bit of wax is normal. You’re looking for:
- Excessive dark wax
- Redness or swelling
- Strong odor (cat ears shouldn’t smell)
- Your cat scratching at their ears or shaking their head a lot
For basic cleaning:
- Get a cotton ball (not a Q-tip) slightly damp with a vet-approved ear cleaner.
- Gently wipe the visible inner ear surface.
- Let your cat shake their head afterward if they want to.
- Offer a treat because ear cleaning is nobody’s idea of fun.
If there’s anything beyond minor dirt—like if the ears seem painful, inflamed, or have a discharge—that’s vet territory, not at-home grooming.
Bathing: Necessary Evil or Just Evil?
I’ve bathed Milo exactly four times in six years:
- Once when he had a run-in with something sticky in the garage
- Once when he somehow got motor oil on his tail (still a mystery)
- Once when he was skunked (nightmare)
- Once when he was prescribed medicated baths for a skin issue
That’s it. Most indoor cats rarely need baths, and Milo has made it abundantly clear he’d prefer to keep it that way.
But if you DO need to bathe your cat, here’s what I’ve learned:
- Preparation is everything. Get everything ready before the cat even knows a bath is happening.
- Place a rubber mat or towel in the sink or tub so they have something to grip.
- Use lukewarm water—test it with your wrist like you would for a baby.
- Have a helper if possible. One person to hold/reassure, one to wash.
- Talk calmly the entire time. I narrate what I’m doing like I’m hosting a bizarre cooking show.
- Wet from the neck down, keeping water away from their face.
- Lather gently with cat-specific shampoo.
- Rinse THOROUGHLY—leftover shampoo can irritate their skin.
- Wrap them in a towel immediately after and keep them in a warm room.
Some people recommend cotton balls in the ears to keep water out. Milo was having NONE of that, so we just did our best to keep his head dry.
Dental Care: My Personal Grooming Failure
I’ll be super honest. After six years, I still haven’t mastered teeth brushing with Milo. We’ve tried:
- Special cat toothbrushes
- Finger brushes
- Dental wipes
- Dental treats
- Water additives
- Dental toys
He tolerates the treats and toys (obviously), occasionally allows a quick swipe with a dental wipe, but actual brushing? Nope. We get dental cleanings at the vet when needed, but I’ve accepted this as my grooming weak spot.
If you want to try where I’ve failed, here’s the recommended approach:
- Let your cat taste the cat toothpaste first. It usually has flavors like chicken or malt that they might actually like.
- Start by just rubbing your finger on their gums.
- Graduate to a finger brush or small cat toothbrush.
- Focus on the outer surfaces of the teeth.
- Keep sessions extremely short.
Maybe you’ll have better luck than me. If you figure out the secret, please let me know!
Special Cases: When Basic Isn’t Enough
Long-Haired Cat Challenges
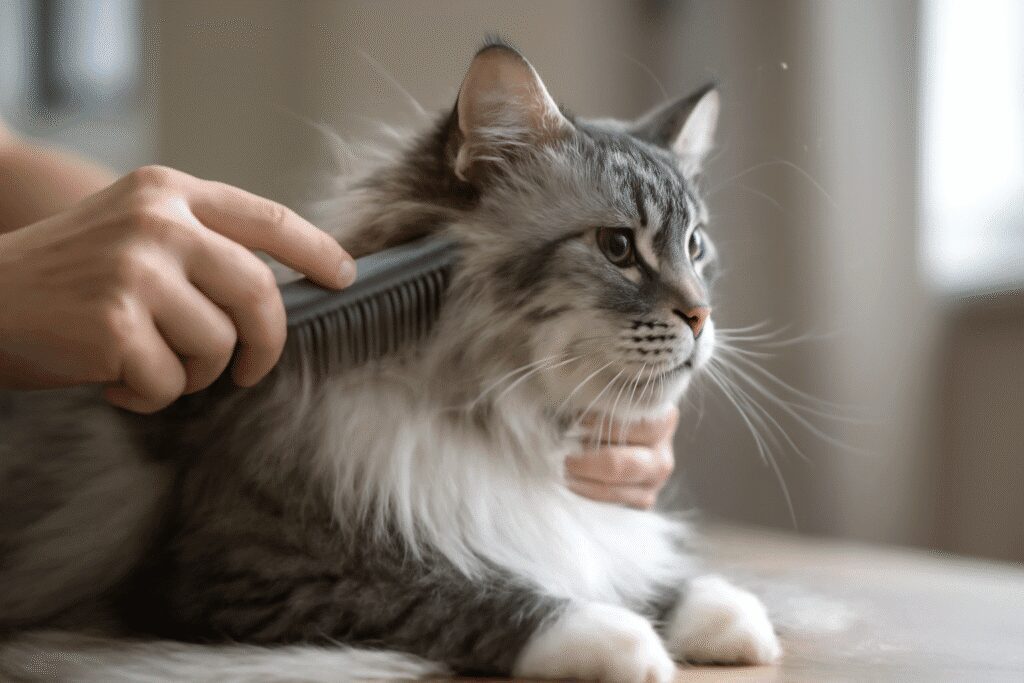
My sister has a gorgeous Maine Coon, and her grooming routine is WAY more involved than mine. For long-haired cats:
- Daily brushing isn’t optional—it’s essential to prevent painful mats.
- Check problem areas daily: behind the ears, the “armpits,” the ruff around the neck, behind the back legs, and the tail.
- Address small tangles immediately before they become big problems.
- Consider professional help for serious matting. Home remedies can sometimes make it worse.
Senior Cat Considerations
As cats age, their grooming needs change:
- Older cats often groom themselves less effectively, so you’ll need to help more.
- Their skin gets thinner and more sensitive, so gentler tools are important.
- Arthritis can make it hard for them to reach certain areas.
- Regular grooming becomes even more important for detecting health issues early.
When Your Cat Has Extra Fluff (The Weight Kind)
Overweight cats have special grooming needs:
- They can’t reach a lot of their body, especially the back half.
- They often develop skin fold issues that need regular cleaning.
- They might need more frequent brushing because they can’t groom themselves adequately.
My aunt’s cat Butterball (aptly named) needs daily attention to his lower back and base of tail area—he simply can’t reach it himself anymore.
A Realistic Grooming Schedule
I won’t lie and say I never miss a grooming session. Life gets busy. But here’s the basic schedule I try to follow with Milo:
| Task | How Often | Time Needed | Notes |
|---|---|---|---|
| Brushing | 3x weekly | 5-10 mins | More during shedding season |
| Nail check | Every 2 weeks | 5 mins | Actual trimming about every 3-4 weeks |
| Ear check | Weekly | 2 mins | Cleaning only if needed |
| Dental attempt | 2x weekly | 2 mins | Usually just dental treats, if I’m being honest |
| Full health scan | Monthly | 10 mins | Checking skin, eyes, teeth, weight |
Your schedule will depend on your cat’s specific needs and your own availability. The important thing is consistency, not perfection.
When Things Go Wrong: Troubleshooting Cat Grooming Tips for Beginners
The “I Hate This” Cat
If your cat runs at the mere sight of a brush:
- Try different tools—sometimes it’s the tool, not the grooming they hate.
- Use treats liberally before, during, and after.
- Create positive associations by leaving the brush near their food or favorite spot.
- Try grooming gloves that make it seem like you’re just petting them.
- Keep sessions ridiculously short at first—like 30 seconds.
The Matted Mess
Finding a mat in your cat’s fur can be stressful, but:
- Never cut mats with regular scissors—cat skin is thinner than you think, and it’s too easy to cut them.
- For small tangles, try working them out gently with your fingers first.
- Use a mat breaker or splitter designed for cats, not regular brushes which can pull painfully.
- Consider a professional groomer for severe matting.
When to Call in the Pros
Sometimes DIY isn’t the answer. Consider professional help when:
- Your cat becomes extremely stressed or aggressive during grooming attempts.
- You find mats that you can’t safely remove.
- Your cat has skin issues like redness, flaking, or unusual bumps.
- Nail trimming feels too intimidating.
Professional groomers have seen it all and often have techniques and tools that make the process less stressful for everyone. I’ve used a mobile groomer twice for Milo—once after he developed mats while I was away on a work trip, and once for his first nail trim because I was too nervous.
FAQs: Common Questions About Cat Grooming Tips for Beginners
How do I groom a cat that absolutely hates being touched?
Start super small—like, microscopically small. Begin with just touching the brush to them for a second, then giving a treat. Don’t even try actual brushing at first. Gradually build up tolerance over weeks, not days. For extremely touch-sensitive cats, try a grooming glove or even just a slightly damp microfiber cloth for quick wipe-downs. Some cats who hate being held might tolerate grooming while sitting on their favorite perch. And if all else fails, talk to your vet—sometimes touch sensitivity can be related to pain issues.
My cat bites me when I try to brush their belly. Should I just skip that area?
Probably, yes. The belly is a vulnerable area for cats, and many will never tolerate brushing there. Focus on the back, sides, and other areas they accept. If there are mats forming on the belly, consider professional help rather than risking a bite (cat bites can become seriously infected). For cats who don’t allow belly brushing, more frequent grooming of other areas can help reduce overall shedding and hairballs.
Is it better to groom a cat before or after they eat?
I’ve found that slightly after mealtime works best for most cats. They’re typically more relaxed and content with a full belly, but not so immediately after eating that they’re still in food-coma mode and might get irritable if disturbed. The absolute worst time? When they’re hungry before a meal—they have zero patience then. Early evening grooming sessions tend to work well for many cats when they’re naturally winding down for the day.
How can I tell if my cat actually needs a bath?
Most indoor cats rarely need full baths. Signs your cat might need bathing include: visible dirt or sticky substances in the fur that they can’t remove themselves, getting into something potentially toxic that they shouldn’t lick off, developing an odor that doesn’t go away with brushing, or if recommended by your vet for skin conditions. Spot-cleaning with pet-safe wipes is usually sufficient for minor messes. If your cat has mobility issues and can’t groom properly, more frequent bathing might be necessary.
Final Thoughts
Looking back at my first nervous attempts to brush Milo compared to our routine now, I can’t believe how far we’ve come. There are still challenges—I doubt he’ll ever enthusiastically welcome nail trims—but we’ve found our groove.
The key things I’ve learned about cat grooming tips for beginners:
- Patience matters more than technique.
- Consistency creates comfort—cats like predictable routines.
- Working with your cat’s personality is crucial. Milo does better with short, frequent sessions rather than long, infrequent ones.
- Sometimes good enough is… good enough. Not every grooming session will be perfect.
Remember that the goal isn’t just a pretty cat—it’s about their health and comfort, plus reducing fur around your home. Even imperfect grooming is better than none at all.
And on those days when your cat decides that the brush is their mortal enemy? Give them (and yourself) a break and try again tomorrow. After all, they’re cats—they were born to be complicated.
I hope these cat grooming tips for beginners help you establish a routine that works for both you and your feline friend. With patience and consistency, you’ll find what works for your unique situation.
References
- American Association of Feline Practitioners. “Feline Grooming Guidelines.”
- PetMD. “How to Groom a Cat That Hates It.”
- Cornell University College of Veterinary Medicine. “Grooming and Coat Health for Your Cat.”
- ASPCA. “Cat Grooming Tips.”
- International Cat Care. “Helping Your Cat with Grooming.”