Contents
- 1 Ultimate Dog Nail Trimming Guide That Banishes Fear
- 1.1 Why Regular Dog Nail Trimming Matters
- 1.2 Complete Dog Nail Trimming Supply List
- 1.3 Preparing Your Dog for Nail Trimming
- 1.4 The Step-by-Step Dog Nail Trimming Guide
- 1.5 What To Do If You Cut the Quick During Dog Nail Trimming
- 1.6 Dog Nail Trimming: Creating a Positive Experience
- 1.7 When to Consider Professional Dog Nail Trimming Help
- 1.8 Special Considerations for Different Dog Nail Trimming Scenarios
- 1.9 Alternatives to Traditional Dog Nail Trimming
- 1.10 Dog Nail Trimming: Frequently Asked Questions
- 1.11 Final Thoughts on Dog Nail Trimming
- 1.12 References
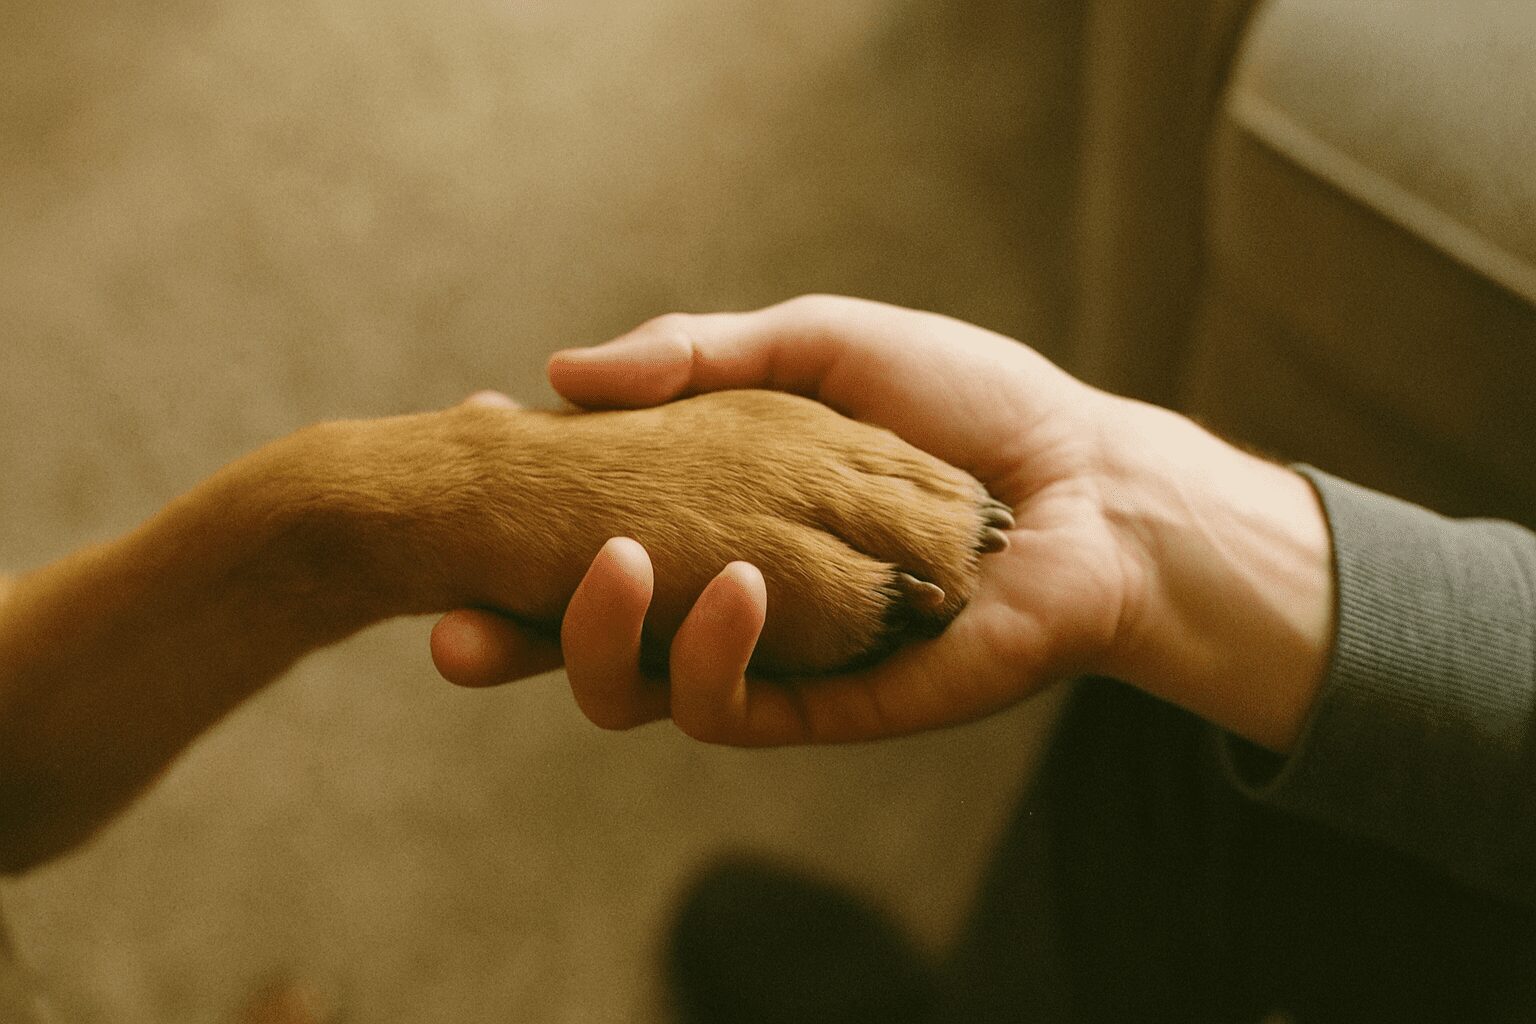
Ultimate Dog Nail Trimming Guide That Banishes Fear
Are you avoiding the dreaded dog nail trimming task because it seems intimidating? Trust me, I’ve been there. When I first brought home my rescue beagle mix, Max, the mere thought of clipping those tiny black nails made my palms sweat. I’ve finally mastered this essential pet care routine after countless YouTube tutorials and a few nervous attempts (including one memorable mishap involving a squealing dog and a little drop of blood).
Let’s explore a practical dog nail trimming guide that will transform this stressful chore into another part of your pet care routine.
Why Regular Dog Nail Trimming Matters
Ever notice how wild canines don’t need nail trims? That’s because they’re constantly wearing down their claws on rough terrain. Your pampered pooch, however, likely spends more time on carpet, grass, and other soft surfaces that don’t provide natural footing. Those rapidly growing nails can create serious problems without regular dog nail trimming.
Overgrown nails aren’t just an aesthetic or scratch hazard for your hardwood floors. They impact your dog’s health in several significant ways:
- They force an unnatural posture by pushing the toes upward, creating joint pain
- They can curl under and pierce the paw pads, causing infection and intense pain
- They’re prone to splitting and cracking, which can lead to painful bleeding
- They reduce traction on slippery surfaces, increasing fall risk for older dogs
- They make walking uncomfortable, potentially reducing your dog’s activity level
A good rule of thumb is that if you hear your dog’s nails clicking on hard floors, it’s definitely time for dog nail trimming. Most dogs need their nails trimmed every 3-5 weeks, though active dogs frequently walking on pavement might go longer between sessions.
Complete Dog Nail Trimming Supply List
Successful dog nail trimming begins with the right tools. Before you start, gather these essentials so you won’t have to scramble mid-session when your wiggling pup is already testing your patience.
Essential Tools for Effective Dog Nail Trimming
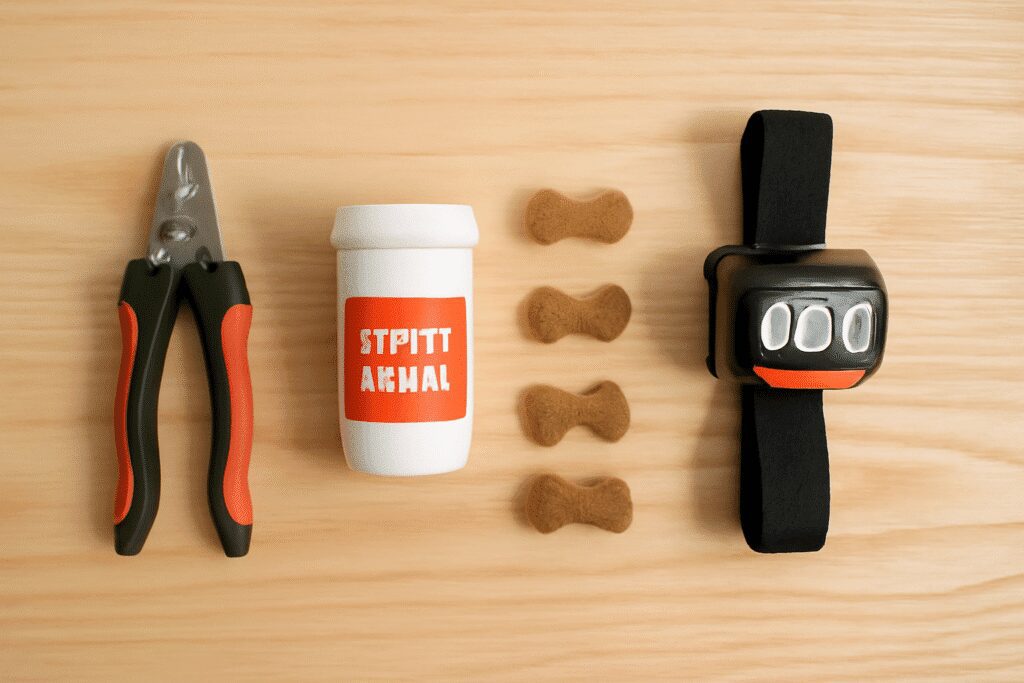
- Quality nail clippers: You have two main dog nail trimming tools options. Guillotine-style clippers work by inserting the nail through a hole and squeezing the handles to lower a blade that slices through—these work well for small to medium breeds. Scissors-style clippers cut more like garden shears, providing better leverage for larger, thicker nails. After struggling with my Lab’s thick nails, I switched to scissors-style, and the difference was night and day.
- Emergency styptic powder is your safety net during dog nail-trimming accidents. If you accidentally cut the quick (the blood vessel inside the nail), this powder quickly stops bleeding. In my first year of dog nail trimming, I went through half a container – now I barely need it, but I never trim without it nearby.
- High-value rewards: Dog nail trimming time should equal jackpot treats time. Use something your dog rarely gets otherwise – small bits of cheese, chicken, or freeze-dried liver work wonders for creating positive associations.
- Proper lighting: Dog nail trimming requires precision, especially with dark nails. A headlamp or bright directional light helps you see exactly what you’re doing and can prevent accidental quick cutting.
- Optional but helpful: A grinding tool for smoothing rough edges after clipping, and an emery board for final polishing. Some dogs prefer the gradual sensation of a grinder to the quick snip of clippers.
Preparing Your Dog for Nail Trimming
The foundation of stress-free dog nail trimming isn’t about technique but preparation. Dogs can detect your nervous energy before you pick up the clippers, so take a deep breath and project confidence even if you don’t feel it yet.
I learned this lesson the hard way. My first dog nail trimming attempts with Max were disasters because my hands shook so badly that I could barely hold the clippers. His resistance decreased dramatically once I started approaching the task with calm confidence (even if partly faked at first).
Begin your dog’s nail trimming journey with a desensitisation process:
- Without clippers in sight, gently handle your dog’s paws while offering treats. Do this daily until your dog is completely comfortable.
- Introduce the clippers as a neutral object. Let your dog sniff them, then immediately reward. Place them nearby during positive activities like mealtime.
- Touch the clippers to your dog’s paws without cutting. Immediately follow with treats and praise.
- For severely anxious dogs, create a multi-week dog nail trimming preparation plan:
- Week 1: Daily paw handling with treats
- Week 2: Touching clippers to paws with treats
- Week 3: Clip a single nail, followed by jackpot treats
- Week 4: Gradually increase the number of nails trimmed per session
Preparation is the most crucial step in the dog nail trimming process. Rushing this foundation building will only create long-term resistance to nail care.
The Step-by-Step Dog Nail Trimming Guide
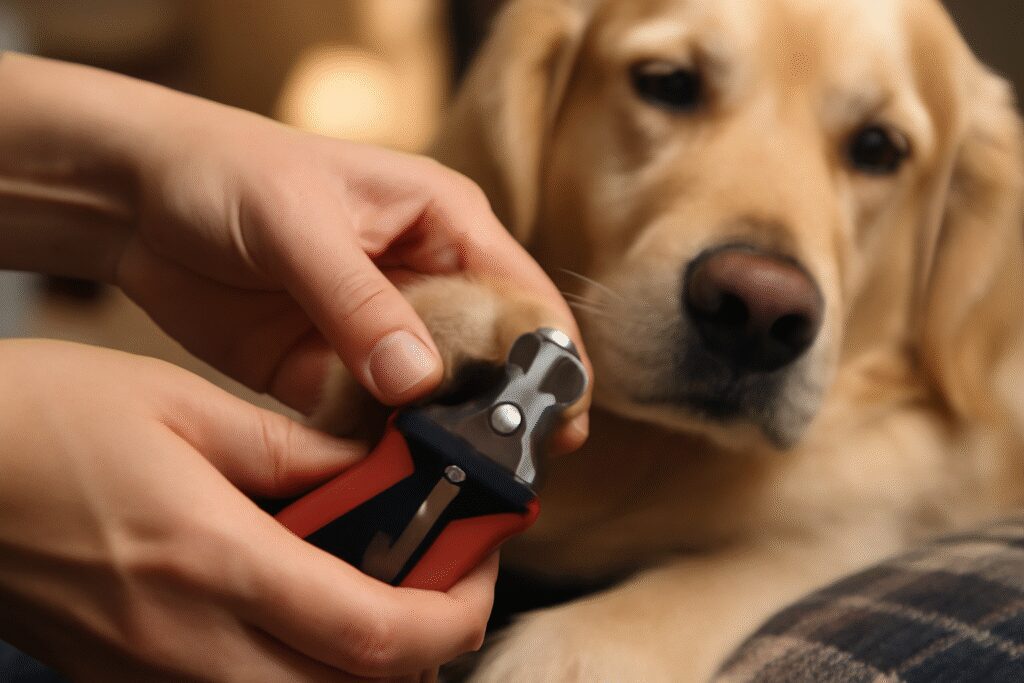
Now for the main event: the actual dog nail trimming process. Position yourself comfortably—this shouldn’t feel like a wrestling match. Some pet parents prefer sitting on the floor with their dog beside them, while others find success on a raised surface like a grooming table or washing machine (with a non-slip mat).
Timing matters significantly. Trimming dog nails after a long walk or play session means your pup is naturally calmer and more tired, making the whole process smoother.
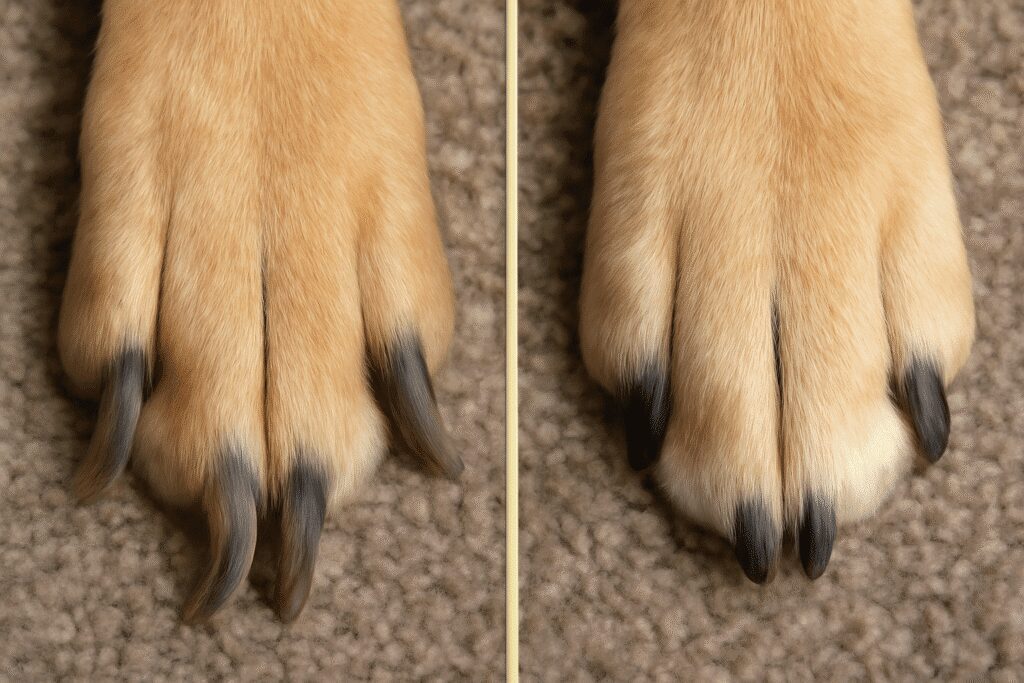
Dog Nail Trimming for Light-Colored Nails
Light nails make dog nail trimming much easier because you can see the pink quick inside:
- Hold your dog’s paw firmly but gently between your thumb and fingers, pressing slightly on the pad to extend the nail.
- Identify the pink area inside the nail—this is the quick, which contains blood vessels and nerves.
- Trim perpendicular to the nail growth, about 2mm from where the quick ends.
- Cut decisively but carefully in one smooth motion rather than hesitant snips.
- Reward immediately after each nail, even if it wasn’t perfect
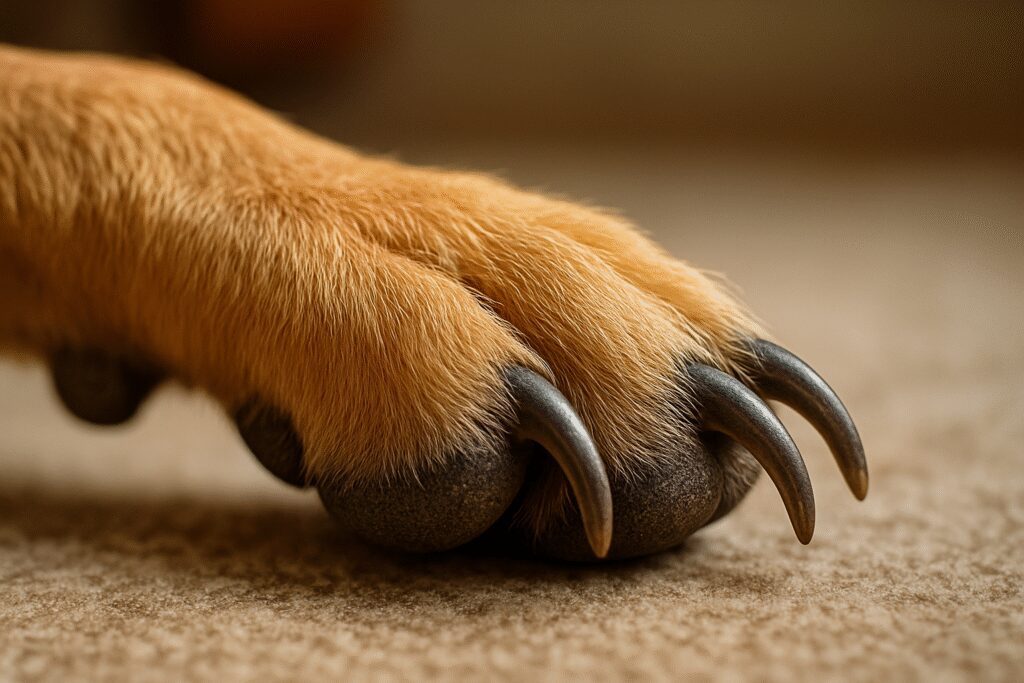
Dog Nail Trimming for Dark-Colored Nails
Dark nails make dog nail trimming more challenging because you can’t see the quick. This requires a more cautious approach:
- Examine the underside of the nail—you’ll notice the nail is hollow at the tip but becomes solid and filled as it approaches the quick.
- Make small slices (1-2mm) at a time, stopping after each cut to check the cut surface.
- Continue until you see a small, darker circle appear in the centre of the cut surface—this is the beginning of the quick
- When you spot this darker centre or a grayish/pink oval, stop cutting that nail.
- Pro tip: If your dog has even one light-colored nail, use that as a length reference for the others
Dealing with Thick Nails in Dog Nail Trimming
Some breeds, particularly larger dogs, have extremely thick nails that can make dog nail trimming intimidating. These substantial nails also increase the risk of crushing or splintering.
For effective thick nail trimming:
- Use heavy-duty, sharp clippers specifically designed for large dogs.
- Consider a “nibble” technique—make minor cuts from different angles rather than trying to cut through the entire nail at once
- Apply firm, consistent pressure rather than jerky motions
- Follow with a grinder to smooth jagged edges and further shorten without risking the quick.
What To Do If You Cut the Quick During Dog Nail Trimming
It happens to even the most careful pet parents—that heart-stopping moment during dog nail trimming when your pup yelps and you see blood. I still remember my first quick-cutting incident with Max; I panicked more than he did!
Don’t beat yourself up—the quick can sometimes extend further than visible, especially if nails have been overgrown. Here’s your emergency protocol for dog nail-trimming accidents:
- Stay calm and reassuring—your panic will only increase your dog’s distress.
- Apply styptic powder immediately by pressing it firmly against the bleeding nail tip.
- Hold pressure for 30-60 seconds without checking (peeking restarts bleeding)
- If you don’t have styptic powder, press the nail into a bar of soap or use cornstarch mixed with a bit of water to form a paste.
- Keep your dog inactive for 15-30 minutes to prevent renewed bleeding.
- Offer an exceptional treat and lots of calm praise.
- Make a mental note to be more conservative with that nail next time, but don’t give up on dog nail trimming altogether.
The bleeding looks worse than it is because the quick has many blood vessels. Once the bleeding stops, your dog will typically forget about the incident sooner than you will. Resume dog nail trimming another day, being extra careful with the previously injured nail, which may have a temporarily sensitive quick.
Dog Nail Trimming: Creating a Positive Experience
The psychological side of dog nail trimming is just as important as the technical aspects. Your mindset directly influences your dog’s experience, creating a virtuous or vicious cycle.
I transformed nail trimming sessions with my dogs by reimagining the whole process. Instead of thinking “I have to get this done,” I approach it as “we’re spending quality time together that happens to include nail care.” This subtle shift made an enormous difference.
Here’s my comparison of problematic versus successful approaches to dog nail trimming:
| Counterproductive Approach | Effective Approach |
|---|---|
| Pinning the dog down firmly | Supporting the body while handling just one paw |
| Marathon sessions trying to do all nails | 1-3 nails at a time with success-focused endings |
| Continuing despite growing resistance | Taking breaks when stress signals appear |
| Tense body language and nervous voice | Relaxed posture and conversational tone |
| Rushing through the dog nail trimming | Patient, deliberate movements |
| Scheduled before exciting activities | Positioned between exercise and rest time |
| Infrequent, dreaded big events | Regular, brief maintenance sessions |
Remember, dogs live entirely in the moment. Any negative dog nail trimming experience can be gradually replaced with positive ones. Don’t hesitate to take a step back in your training if needed—one successful nail trim is better than forcing all four paws and creating lasting resistance.
When to Consider Professional Dog Nail Trimming Help
Despite your best efforts, some dog-owner pairs struggle with at-home dog nail trimming. There’s absolutely no shame in delegating this task to professionals—in fact, it’s often the kindest choice for both of you.
Consider professional dog nail trimming if:
- Your dog shows extreme distress despite gradual conditioning attempts
- You feel anxious or uncertain even after multiple attempts and research
- Your dog has black nails and you lack confidence in identifying the quick
- Your dog has developed a deep fear association with nail tools
- You have physical limitations like arthritis or vision problems that make precise dog nail trimming difficult
- Your dog’s nails have become severely overgrown and need expert correction
During my first six months with my rescue dog who had previously traumatic nail trimming experiences, I used a professional groomer. This gave me time to build trust in other areas before tackling this sensitive task myself.
Professional dog nail trimming typically costs $12-25 as a standalone service. Many veterinarians and groomers are surprisingly affordable for this quick procedure. While there, ask the professional to demonstrate their dog nail trimming technique—most are happy to show you their approach.
Even if you ultimately choose professional help, continue handling your dog’s paws regularly at home to maintain their comfort with paw manipulation.
Special Considerations for Different Dog Nail Trimming Scenarios
Dog Nail Trimming for Puppies
Start handling your puppy’s paws from day one. Their nails are tiny and sharp, so they’ll need more frequent dog nail trimming, but they’re also easier to cut. Make it playful and always follow with praise.
Dog Nail Trimming for Senior Dogs
Older dogs often have thicker, more brittle nails. They might also have less patience for the dog nail trimming process. Work even more slowly and consider more frequent, shorter sessions.
Dog Nail Trimming for Anxious Dogs
Some dogs just hate having their paws touched. For these pups, desensitization is key. Spend weeks just touching paws, then presenting clippers, before attempting actual dog nail trimming.
Alternatives to Traditional Dog Nail Trimming
Not everyone feels comfortable with clippers, and that’s okay. There are alternatives:
- Nail grinders: These electric tools file down the nail gradually rather than cutting. They’re gentler but louder.
- Scratch boards: You can train your dog to file their own nails by pawing at a sandpaper-covered board. This works especially well for front nails.
- Regular walks on concrete: While not enough on its own, walking on rough surfaces helps wear down nails naturally.
Dog Nail Trimming: Frequently Asked Questions
How often should I follow a dog nail trimming routine?
Most dogs need dog nail trimming every 3-4 weeks. If you hear clicking on hard floors, it’s time for a trim. Active dogs who walk on concrete regularly might need less frequent trimming.
What if my dog absolutely hates dog nail trimming?
Patience is key. Start with very short sessions focused on handling paws. Use high-value treats that are only given during dog nail trimming time. Consider calming aids like lick mats spread with peanut butter to distract during trimming.
Is it better to use clippers or a grinder for dog nail trimming?
Neither is inherently better – it depends on what works for you and your dog. Clippers are faster but require more precision. Grinders are more gradual but make noise that some dogs dislike. Many people find success using clippers first, then finishing with a quick grind to smooth edges.
My dog has black nails. How do I avoid cutting the quick during dog nail trimming?
Trim just a tiny bit at a time when performing dog nail trimming on black nails. After each small cut, look at the cut surface – when you see a dark circle in the center, stop trimming that nail. This dark spot is the beginning of the quick.
Final Thoughts on Dog Nail Trimming
Learning to master dog nail trimming is one of those skills that seems daunting at first but gets easier with practice. The most important thing is staying calm and making it a positive experience.
I still remember how nervous I was the first time I trimmed my dog’s nails. My hands were shaking, and we only managed one paw before we both needed a break. Now it’s just another part of our routine – not his favorite part, maybe, but no longer a cause for drama.
Regular dog nail trimming is an important part of your dog’s overall health care. With patience and practice, you’ll develop confidence in your dog nail trimming skills, and your furry friend will thank you for it with happy, comfortable paws.
References
Peterson, M. (2023). Small Animal Orthopedics and Mobility. Veterinary Clinics of North America: Small Animal Practice, 53(4), 827-841.
Murray, J., & Foley, P. (2022). Companion Animal Care: A Comprehensive Guide for Pet Owners. Journal of Veterinary Behavior, 47, 76-85.
American Kennel Club. (2024). Nail Care for Dogs: Tips from Professional Groomers. Retrieved from https://www.akc.org/expert-advice/health/nail-care/