Contents
- 1 How to Groom a Dog at Home: A Complete Guide for Beginners
- 1.1 Why I Started Grooming My Dog at Home (And Why You Might Want To)
- 1.2 What You’ll Need: The Basics and Then Some
- 1.3 Getting Your Dog On Board With This Whole Grooming Idea
- 1.4 The Actual How-To Part: Starting With Brushing
- 1.5 Bathing Your Dog Without Flooding Your Bathroom
- 1.6 The Drying Dilemma
- 1.7 The Nail Trimming Terror
- 1.8 Ear Cleaning Without the Drama
- 1.9 The Teeth Situation
- 1.10 Different Dogs, Different Grooming Needs
- 1.11 My Actual Grooming Schedule vs What I Should Be Doing
- 1.12 When Things Go Wrong: Grooming Mishaps and Solutions
- 1.13 When to Wave the White Flag and Call a Professional
- 1.14 FAQs About How to Groom a Dog at Home
- 1.15 Final Thoughts
- 1.16 References
How to Groom a Dog at Home: A Complete Guide for Beginners
So you want to learn how to groom a dog at home, huh? Trust me, I get it. Professional grooming prices these days are enough to make anyone’s wallet cry. When I first looked into grooming my Golden Retriever, Max, the quotes I got were… well, let’s just say I could’ve had a nice dinner out for that price. Every month. Learning how to groom a dog at home was one of the best decisions I’ve made as a pet parent.
I’ve been grooming Max myself for about three years now. Am I perfect at it? Nope. Has he had a few questionable haircuts? You bet. But we’ve figured it out together, and honestly, home grooming has become one of those weird things I look forward to now.
Why I Started Grooming My Dog at Home (And Why You Might Want To)
Look, I didn’t wake up one day thinking, “You know what sounds fun? Learning how to groom a dog at home!” It started as a necessity, really. But figuring out how to groom a dog at home properly has saved me a ton of money and stress in the long run.
Professional grooming in my area runs about $75-90 for a dog Max’s size, and that adds up fast. Plus, Max would come home from the groomer completely stressed out. He’d hide under the bed for hours afterward. Poor guy just hated the whole experience.
I figured I couldn’t do much worse, so I watched some YouTube videos, bought some basic supplies, and gave it a shot. That first attempt was… interesting. Let’s just say Max looked a bit lopsided for a few weeks. But we both survived, and things got better with practice.
Beyond saving money, there are actual good reasons to groom your dog yourself:
- You notice skin issues, lumps, or ticks right away
- Your dog might actually prefer your handling to a stranger’s
- No stressful car rides or sitting in cages at the groomer
- You can take your time instead of rushing through it
- It’s actually kind of satisfying once you get the hang of it
The bond thing is real, too. Max and I have this whole routine now where he knows certain commands for turning or lifting his paw, and he gets little treats throughout. He still doesn’t love getting his nails trimmed (who does?), but he tolerates everything else pretty well.
What You’ll Need: The Basics and Then Some
Before we dive into how to actually groom a dog at home, let’s talk about supplies. And look, I’m not going to pretend you don’t need to invest a little up front. You do. But these tools will last years if you get decent quality ones.
When I first started, I cheaped out and bought a $9 brush from the grocery store pet aisle. Big mistake. That thing pulled Max’s fur so bad he wouldn’t let me near him with a brush for weeks afterward. Lesson learned.
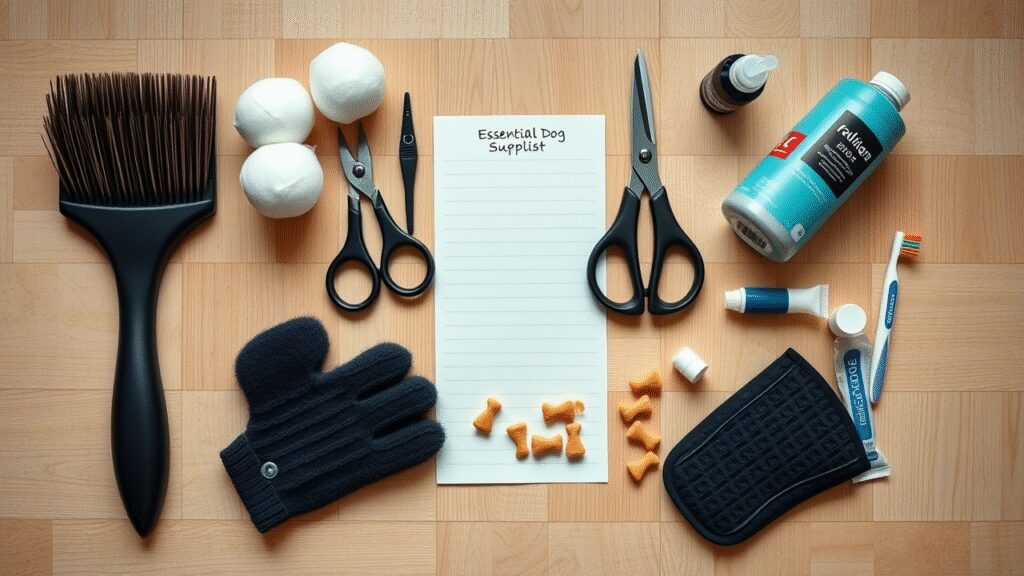
Must-Have Supplies
Here’s what you’ll actually need:
- Dog brush for your specific dog’s coat type (more on this later)
- Dog shampoo – NOT human shampoo, which is way too harsh
- Dog conditioner (optional but nice for long-haired dogs)
- Nail clippers made for dogs or a nail grinder if your dog hates clippers
- Blunt-tip scissors (seriously, get the blunt ones, I learned this the hard way)
- Dog toothbrush and enzymatic toothpaste
- Lots of towels – more than you think you need
- Treats, so many treats
That’s the bare minimum. If you’ve got a dog with more complex grooming needs (like my neighbor’s Shih Tzu), you might also want:
- Slicker brush for detangling
- Dematting tool (these look medieval but work wonders)
- Electric clippers if you’re brave enough to try actual haircuts
- Grooming table if your back can’t handle bending over
I started with just the basics and added things as I needed them. The clipper investment was scary – I paid about $80 for a decent pair – but they’ve lasted three years so far, so that’s like… two professional grooming sessions.
Getting Your Dog On Board With This Whole Grooming Idea
So here’s the thing about dogs – they can tell when you’re nervous. And when I first held those clippers, my hands were shaking like I’d had eight cups of coffee.
Take it from someone who made all the mistakes: rushing into a full groom with a dog who’s never been groomed at home before is a recipe for disaster. Instead, try this approach that actually worked for me:
The Slow Introduction Method That Saved My Sanity
Start by just having the tools around. Let your dog sniff them while you give treats. Click the clippers on for just a second, give a treat. Touch the brush to their back, give a treat. You get the idea.
I spent about a week just getting Max used to the sound of the nail clippers before I even tried to touch his paw with them. Overkill? Maybe. But it worked.
For the actual intro to grooming:
- Try a mini-session of just 5 minutes of brushing
- End BEFORE your dog gets annoyed or stressed
- Heap on the praise like they just won a dog Olympics
- Gradually increase time over weeks
I found that grooming Max right after a long walk works best – he’s tired enough to stay still but not so tired he’s cranky. Your dog might be different. My friend’s terrier is apparently at his most cooperative first thing in the morning. Go figure.
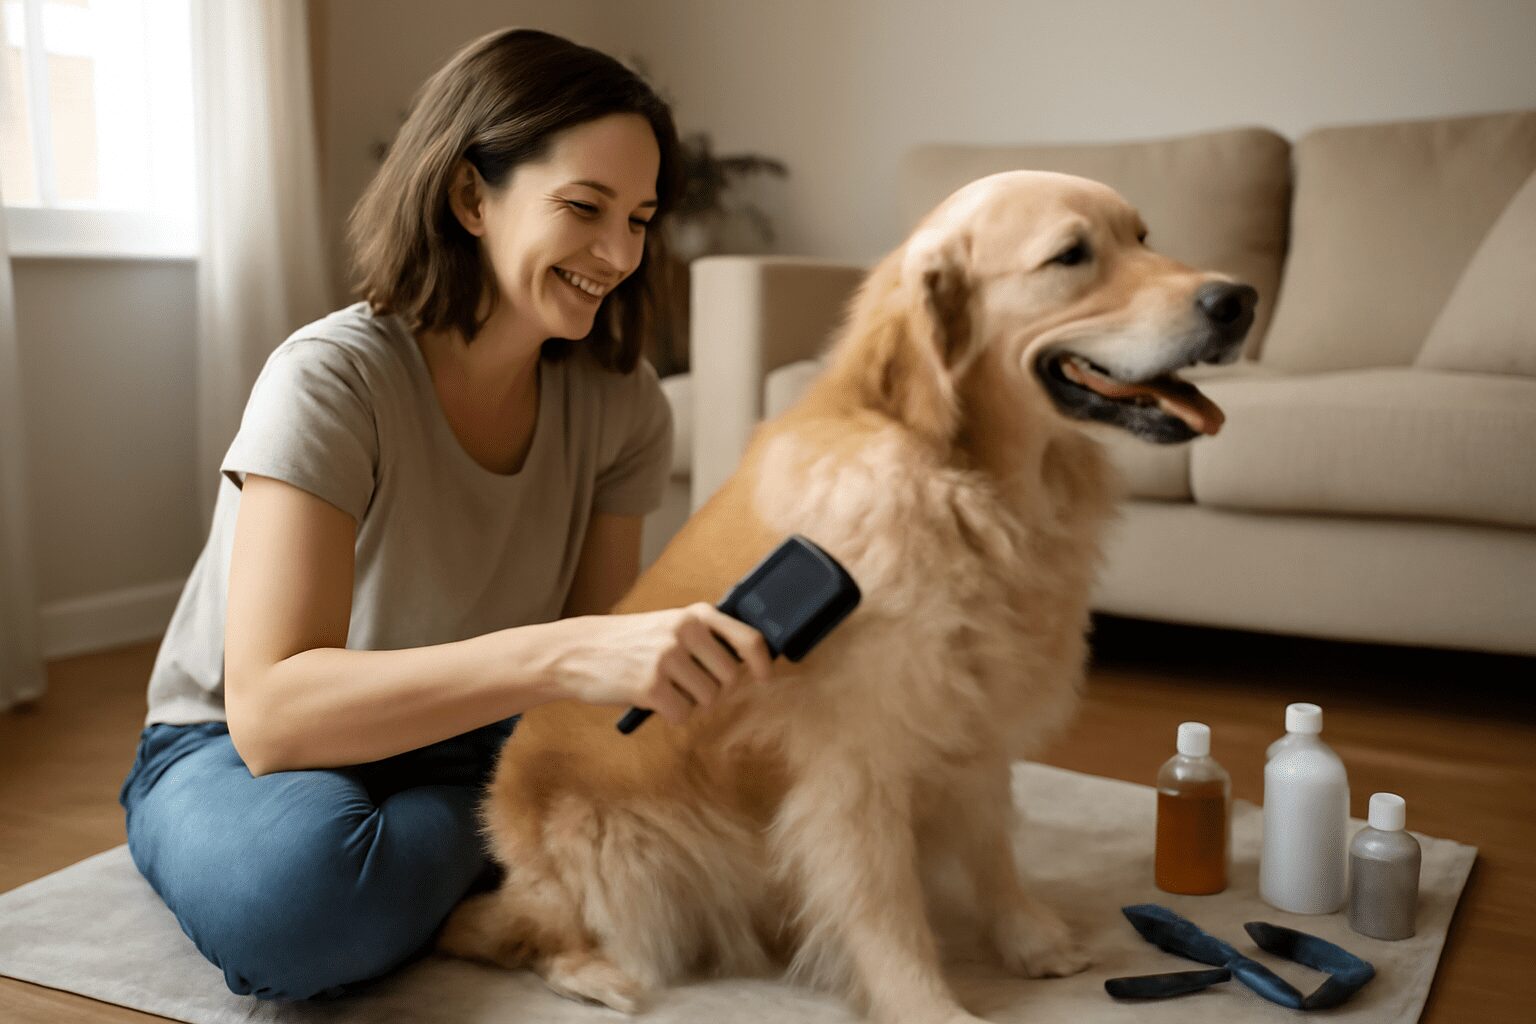
The Actual How-To Part: Starting With Brushing
When learning how to groom a dog at home, remember this golden rule: Always, ALWAYS brush before bathing. I didn’t know this when I first started figuring out how to groom a dog at home and ended up with a wet, matted mess that took forever to sort out.
Brushing removes loose fur, prevents painful mats from forming during the bath, and distributes natural oils. It’s like the foundation of everything else.
Brushing Based On Your Dog’s Coat Type
Short-haired dogs (like Labs or Beagles): Use a rubber curry brush or grooming mitt. These are way more effective than you’d think. My sister’s Lab only needs a quick once-over with a rubber brush, and it’s amazing how much fur comes off. Lucky her.
Long-haired dogs (like Yorkies or Maltese): Start with a pin brush to work through the length, then follow with a comb to catch any remaining tangles. Work in small sections from the ground up.
Double-coated dogs (like my Max or a Husky): You’ll need an undercoat rake or a deshedding tool. Work in the direction of hair growth and be gentle – that undercoat can be deceptively thick. When Max blows his coat in spring, I swear I could stuff a mattress with the fur that comes out.
Curly-haired dogs (Poodles, Doodles): These need a slicker brush and lots of patience. Their hair tangles so easily, and mats can form close to the skin where you don’t even notice them.
My neighbor has a Goldendoodle who needed to be shaved down because she didn’t keep up with brushing, and the poor dog had mats the size of golf balls hidden under his fluffy outer coat. Don’t be like my neighbor.
Bathing Your Dog Without Flooding Your Bathroom

I’m not going to lie – bathing a large dog at home can be… an adventure. The first time I bathed Max, we both ended up soaked, the bathroom looked like a small tsunami had hit it, and somehow there was shampoo on the ceiling? Still not sure how that happened.
Some things I’ve learned:
- Put a non-slip mat in the tub. Your dog will feel more secure, and a secure dog is a cooperative dog.
- Use lukewarm water. Not hot, not cold. Test it like you would for a baby.
- Have everything within reach before starting. You do NOT want to be reaching for shampoo with one hand while holding a wet, soapy dog with the other.
- If you have a detachable shower head, use it. If not, a plastic cup works in a pinch.
- Consider using an adapter that attaches to your faucet with a long hose. Game changer for me.
The actual bathing process goes something like this:
- Get your dog thoroughly wet, avoiding the head at first
- Apply shampoo starting at the neck and work your way back
- Really work it into a lather with your fingers (this is where the dirt hides)
- Pay extra attention to paws, belly, and… the back end
- Rinse completely – leftover shampoo causes itching
- Optional: conditioner for long-haired dogs
- Final rinse (longer than you think necessary)
For Max’s face, I use a washcloth with just a tiny bit of shampoo. It gives me better control and keeps soap out of his eyes. He still hates it, but he tolerates it, which is all I can ask for really.
The Drying Dilemma
So your dog is clean but soaking wet. Now what?
I tried using my own hair dryer on Max once. ONCE. He freaked out completely at the noise, and I don’t blame him. Some dogs are fine with dryers, but if yours isn’t, don’t force it.
Instead, I use this system:
- First towel: The initial big water removal. Just press and squeeze gently.
- Second towel: More thorough drying, working section by section.
- Third towel (yes, really): A final pass, followed by letting him air dry in a warm room.
If your dog tolerates a dryer, great! Use the cool setting (never hot) and keep it moving so it doesn’t concentrate on one spot. Keep the dryer a few inches away from the skin.
I’ve found that even with towel drying, Max takes a couple of hours to fully dry. During this time, he will inevitably find the one expensive rug in the house and roll on it. Every. Single. Time. Maybe put your good rugs away on bath day.
The Nail Trimming Terror
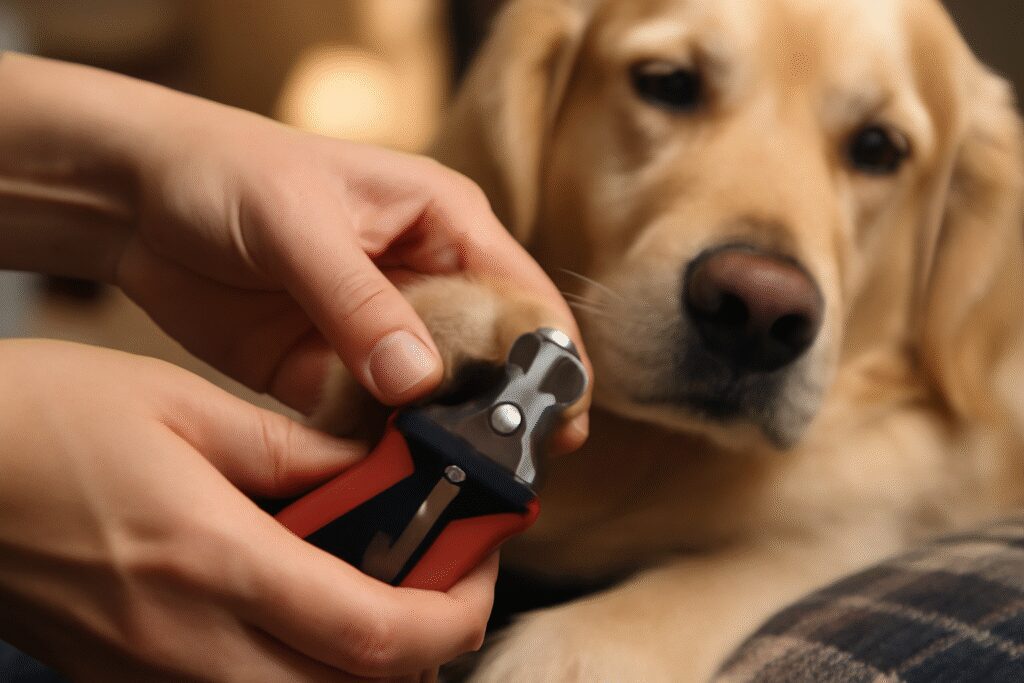
Let’s be honest – this is the part most of us dread. I’ve been trimming Max’s nails for three years and still get nervous every time.
The key is to just trim a tiny bit at a time. Like, really tiny. It’s better to trim too little than too much. If your dog has clear nails, you can see the pink quick inside – stay well away from that. For dark nails, just trim the hook at the end, a little at a time.
My method that seems to work:
- Get your dog in a comfortable position (lying down works for Max)
- Hold the paw firmly but not tight – squeeze the pad gently to extend the nail
- Trim just the tip, perpendicular to the ground
- Reward after EACH nail, not just each paw
- It’s okay to only do a few nails per day if that’s all your dog can handle
I keep styptic powder nearby just in case I cut too close (it happened once, I felt terrible). It stops bleeding quickly if you do nick the quick.
If your dog absolutely cannot deal with nail trimmers, try a nail grinder instead. They take longer but some dogs tolerate them better. Or, try my lazy person’s hack: lots of walks on concrete will help wear down nails naturally.
Ear Cleaning Without the Drama
Ear cleaning isn’t complicated, but it does require some care. You never want to stick anything into the ear canal – not a Q-tip, not your finger, nothing.
Instead:
- Check the ears first – they should be pink, not red, and not smelly
- Put a little ear cleaner on a cotton ball (never pour directly into the ear)
- Wipe the visible parts of the inner ear
- Let your dog shake their head after (maybe stand back for this part)
If your dog’s ears are red, inflamed, super dirty, or smell bad, that’s vet territory, not home grooming territory.
The Teeth Situation
Okay, I’ll admit it – I’m not great about brushing Max’s teeth regularly. It’s the grooming task that most often falls by the wayside in our house. But it is important.
Dog-specific toothpaste comes in flavors like chicken and peanut butter, which helps. Never use human toothpaste – the fluoride can make dogs sick.
Start by just letting your dog lick a bit of toothpaste off your finger. Then try touching their teeth with your finger. Eventually work up to a doggy toothbrush or a finger brush.
Focus on the outer surfaces of the teeth, especially the back ones. Even a 30-second brush is better than nothing.
If your dog absolutely refuses tooth brushing, dental chews can help (though they’re not a complete replacement). My vet also recommended adding a dental additive to Max’s water, which seems to help with his breath at least.
Different Dogs, Different Grooming Needs
I’ve focused a lot on my experience with Max, who’s a Golden Retriever with a thick double coat. But your dog might have totally different needs.
Short-Haired Dogs
My sister’s Lab mix gets off easy. Her grooming routine is basically:
- Quick brush once a week
- Bath every couple months or when she rolls in something gross
- Regular nail trims and ear checks
That’s it. Some people are just lucky, I guess.
Long-Haired Dogs
My coworker has a Shih Tzu who needs:
- Daily brushing to prevent mats
- Regular trimming around the eyes (for vision) and rear end (for… hygiene)
- Full haircuts every 6-8 weeks
- More frequent bathing because the long hair traps dirt
She actually ended up taking a dog grooming course because it was getting so expensive to maintain.
Double-Coated Breeds
Dogs like Huskies, German Shepherds, and Golden Retrievers have special considerations:
- NEVER shave them – it damages the coat and removes their natural insulation
- Expect major seasonal shedding (“blowing coat”)
- Invest in a good vacuum. And maybe a second one as backup.
During shedding season, I brush Max outside daily and still find tumbleweeds of fur in the house corners. It’s just part of life with these breeds.
Curly-Haired Dogs
Poodles, Bichons, and many Doodle mixes have hair that grows continuously (more like human hair):
- They need regular haircuts
- Their coats mat very easily if not brushed frequently
- Many owners learn basic clipping to maintain between professional grooms
My Actual Grooming Schedule vs What I Should Be Doing
In a perfect world, here’s what Max’s grooming schedule would look like:
| Grooming Task | Ideal Frequency | My Reality |
|---|---|---|
| Brushing | 3-4 times weekly | 1-2 times when I notice fur everywhere |
| Bathing | Every 4-6 weeks | When he starts to smell doggy |
| Nail Trimming | Every 3-4 weeks | When they click on the hardwood |
| Ear Cleaning | Every 2 weeks | Usually remember with bathing |
| Teeth Brushing | 2-3 times weekly | …I try my best |
| Full Grooming | Every 6-8 weeks | Roughly seasonal or before company visits |
Hey, we’re all human. The important thing is maintaining a baseline of care that keeps your dog comfortable and healthy.
When Things Go Wrong: Grooming Mishaps and Solutions
Let’s talk about when home grooming goes sideways, because it will at some point.
The Wiggly Dog Problem
Max used to be so squirmy during grooming that I considered growing a third arm. What helped was:
- Exercising him well beforehand
- Using a leash attached to something sturdy for baths
- Taking more breaks with more treats
- Enlisting my husband to help with distraction techniques
The Fear Factor
If your dog seems genuinely afraid (shaking, hiding, showing whites of eyes):
- Back up and go slower with the introductions
- Try different tools (quieter clippers, different brush types)
- Consider calming aids like ThunderShirts or pheromone diffusers
- Make each step ultra-rewarding with amazing treats
I found that string cheese torn into tiny pieces works wonders as a high-value reward for Max during nail trims.
The “I Cut Too Much” Panic
If you trim too much fur or create an uneven look:
- Remember it grows back (I repeat this mantra often)
- Focus on making it even enough to be functional
- Have a sense of humor about it
- Learn for next time
Max once had what I can only describe as “half a mohawk” after I got distracted mid-groom. We just went with it for a few weeks until it grew out enough to fix.
When to Wave the White Flag and Call a Professional
There’s no shame in knowing your limits. I still take Max to a pro about twice a year, usually before summer and winter, for a thorough grooming.
Consider professional help when:
- You encounter severe matting that would be painful to remove
- Your dog needs a complex haircut style
- You’ve tried home grooming and it’s creating stress for both of you
- Your dog has skin issues or abnormalities you’re not sure about
- You just need a break from doing it yourself
Even professional groomers take their own dogs to other groomers sometimes!
FAQs About How to Groom a Dog at Home
How often should I actually bathe my dog?
It really depends on your dog’s lifestyle and coat type. My vet told me that with regular brushing, most dogs only need baths every 4-8 weeks unless they get particularly dirty. Over-bathing can dry out their skin. I usually give Max a bath when he starts giving off that distinct “dog” smell, or when he finds something dead to roll in at the park. That happens more often than I’d like.
What if my dog absolutely freaks out about nail trimming?
Been there. Try a nail grinder instead of clippers – some dogs prefer the sensation. Or try just trimming one nail per day with lots of treats. If all else fails, your vet or groomer can do nails for a small fee usually, even if you handle the rest of grooming yourself. Some dogs never really get comfortable with it, and that’s okay.
I cut my dog’s nail too short and it’s bleeding. Now what?
First, don’t panic (easier said than done, I know). Apply styptic powder if you have it, or cornstarch or flour in a pinch. Apply pressure with a clean cloth for a few minutes. The bleeding usually stops quickly. Give lots of comfort and treats. And don’t beat yourself up – it happens to everyone at some point.
Can I use my hair dryer on my dog?
You can, but only on the cool setting, never hot. And honestly, many dogs hate the noise. I’d recommend getting a cheap dryer specifically for pets if your dog needs blow-drying – they’re designed to be quieter and have settings appropriate for dog skin. But many dogs, especially those with shorter coats, dry just fine with good toweling and air drying.
Is it worth buying dog clippers for home use?
If you have a dog that needs regular haircuts, quality clippers will pay for themselves within 3-4 grooming sessions. Just know there’s a learning curve. My first few attempts at trimming Max’s feathering were… creative looking. YouTube tutorials specific to your dog’s breed can be incredibly helpful. Start conservatively – you can always cut more, but you can’t put it back!
Final Thoughts
Learning how to groom a dog at home has been quite the journey for Max and me. There have been some questionable haircuts and a few stressed-out moments for both of us. But three years in, I can say it’s been worth it.
Not just for the money saved, though that’s significant. It’s also about the confidence I’ve gained in handling my dog, and the trust he’s developed in me. Grooming has become our special time together, even if neither of us particularly love every minute of it.
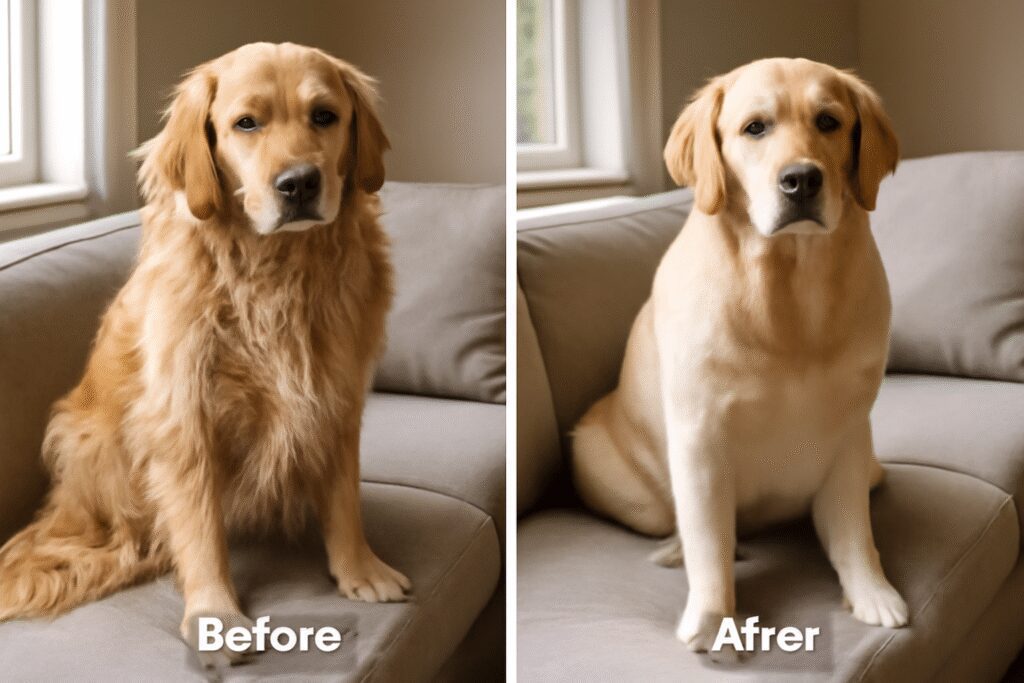
If you’re just starting out, be patient with yourself and your dog. You’ll both get better at this with practice. Take lots of before and after photos – partly to track your progress, and partly because some of the “during” moments will be hilarious in retrospect.
And remember that a slightly imperfect groom by a loving owner is often less stressful for your dog than a perfect groom by a stranger. Your dog doesn’t care if their haircut is a bit lopsided – they just want to feel safe, comfortable, and loved.